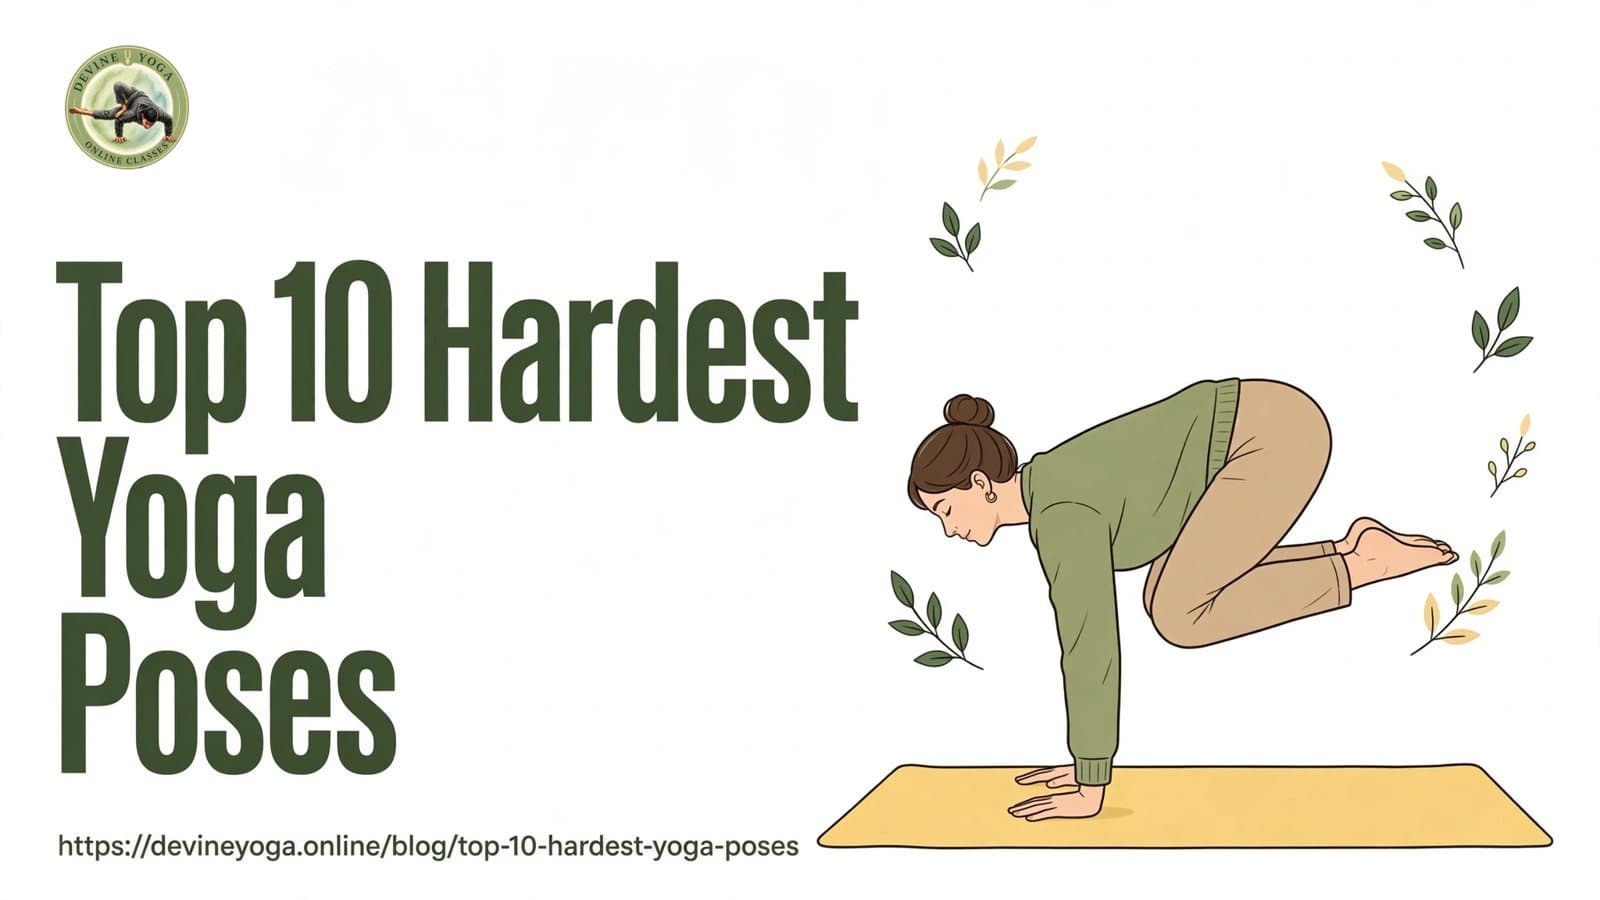
Top 10 Hardest Yoga Poses
Explore 10 hardest yoga poses, why they're difficult, prerequisites, safe progressions, modifications and expert safety tips for yoga practitioners.
Summarize this blog with:
Some yoga poses look almost impossible the first time you see them. Imagine balancing your entire body on your hands, folding your legs behind your head, or bringing your feet towards your head while balancing on your forearms. Impressive? Absolutely. Something you should rush to try? Definitely not.
The hardest yoga poses challenge much more than flexibility. They demand strength, balance, coordination, body awareness and, above all, patience. A pose that feels manageable for a gymnast might be extremely challenging for someone who spends eight hours a day at a desk.
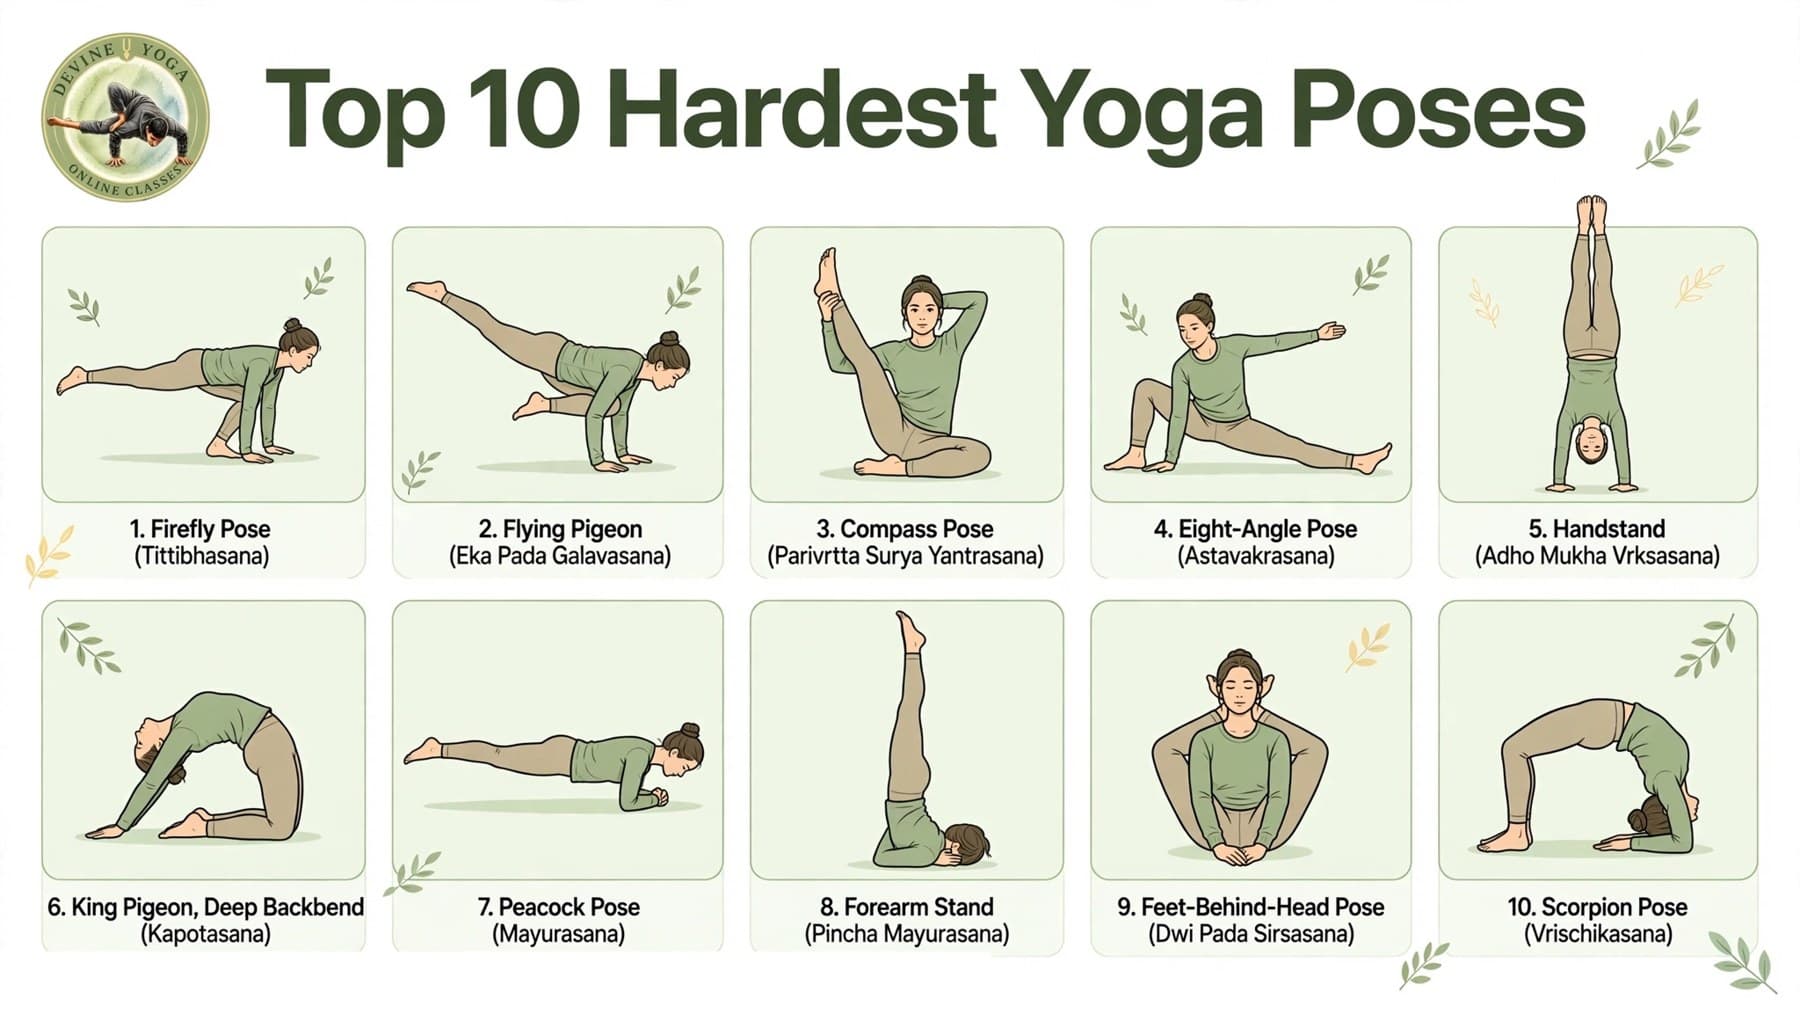
In this guide, we'll explore 10 of the most difficult yoga poses, ranked from hard to hardest according to their physical demands. You'll learn why each pose is challenging, what your body needs before attempting it, how to approach its preparation safely and which modifications can help.
How We Ranked the Hardest Yoga Poses
We considered four practical factors when ranking these advanced yoga poses:
- Flexibility: How much mobility the pose requires in the hips, shoulders, spine and hamstrings.
- Strength: How much work the arms, shoulders, back and core must do to support the body.
- Balance and coordination: How precisely you must control your body, particularly when inverted.
- Risk and control: How demanding the position is to enter, maintain and exit safely if your balance or alignment changes.
The risk levels below are qualitative guidance, not medical assessments. A pose's risk also depends on how you practise it and whether you have suitable supervision.
| Pose | Main challenge | What you need first | General risk level |
|---|---|---|---|
| 1. Firefly | Hip mobility and arm strength | Squat, core and wrist control | High |
| 2. Flying Pigeon | Hip rotation and balance | Crow preparation and core strength | High |
| 3. Compass | Hamstring and shoulder mobility | Comfortable seated hip movement | Moderate–high |
| 4. Eight-Angle | Arm strength and twisting | Stable arm balances | High |
| 5. Handstand | Inversion and balance | Strong shoulders and wrist tolerance | High |
| 6. King Pigeon | Deep spinal extension | Shoulder and back mobility | High |
| 7. Peacock | Wrist loading and core control | Strong wrists and forearms | High |
| 8. Forearm Stand | Shoulder stability and inversion | Dolphin pose and wall-supported control | High |
| 9. Feet-Behind-Head | Extreme hip rotation | Exceptional hip mobility and control | High |
| 10. Scorpion | Inversion and deep backbend | Forearm balance and spinal control | Very high |
The order reflects the combined demands of these particular variations. It is not a universal difficulty scale, and the order may change for different practitioners.
10 Most Difficult Yoga Poses
1. Firefly Pose (Tittibhasana)
What it is and why it's hard: Firefly is an arm balance in which you support your body on your hands while extending both legs forward. It combines hip opening, hamstring flexibility, shoulder stability and considerable core strength. The challenge is keeping your legs lifted without collapsing through your shoulders.
What you need first: A comfortable deep squat, active hamstring mobility, stable wrists and the ability to support some body weight through your hands.
A safer progression:
- Warm up with wrist circles and gentle weight shifts on your hands.
- Practise Malasana (Garland Pose), using a block beneath your seat if needed.
- Explore placing your shoulders beneath your thighs without lifting your feet.
- Practise gentle seated leg extensions to build control.
- With a qualified teacher, try a brief supported lift, keeping your feet close to the floor.
Common mistakes: Rounding the upper back excessively, dumping weight into the wrists, forcing straight legs or holding your breath.
Gentler option: Practise a supported squat and seated leg lifts, or keep your feet on blocks while learning the arm position.
Safety note: Stop if your wrists hurt or your shoulders feel unstable. Don't jump into the full pose before developing the necessary strength and mobility.
2. Flying Pigeon (Eka Pada Galavasana)
What it is and why it's hard: Flying Pigeon is an advanced arm balance that combines a figure-four hip position with a forward-leaning balance on the hands. One leg rests across the upper arms while the other extends behind you. It requires hip rotation, shoulder strength and precise weight transfer.
What you need first: Comfortable external hip rotation, stable wrists, a controlled Crow Pose preparation and the ability to lean forward without panicking or collapsing.
A safer progression:
- Warm up your hips and wrists.
- Practise a reclined figure-four stretch without pulling your knee into discomfort.
- Build strength with short, controlled Crow Pose preparations.
- Explore the leg position while keeping both feet grounded.
- Under supervision, practise transferring weight forward with a padded surface in front of you.
Common mistakes: Forcing the crossed knee, rushing the forward lean, kicking the back leg up or allowing the elbows to slide apart.
Gentler option: Reclined figure-four stretches and supported Crow preparations help develop the relevant skills without the full balance.
Safety note: Never force the bent knee into position. If your knee or hip feels pinched, back out rather than trying to stretch through it.
3. Compass Pose (Parivrtta Surya Yantrasana)
What it is and why it's hard: Compass is a seated pose that brings one leg high towards the shoulder while the torso turns and an arm helps hold the leg. It demands substantial hamstring flexibility, hip mobility, shoulder movement and controlled rotation.
What you need first: Comfortable seated forward folds, hip mobility without pinching and the ability to rotate your torso without forcing your lower back.
A safer progression:
- Warm up with gentle hamstring movements and seated twists.
- Sit on a folded blanket to make the pelvis easier to position.
- Practise a bent-knee hamstring stretch using a yoga strap.
- Explore lifting one knee towards the shoulder while keeping the spine long.
- Add the arm bind and gentle rotation only if the earlier steps feel comfortable.
Common mistakes: Pulling the foot towards the head, rounding the spine to imitate a photograph or twisting aggressively from the lower back.
Gentler option: Use a strap around the foot and keep the knee bent. A seated side stretch can also develop useful mobility with less strain.
Safety note: Stop if you experience sharp pain, tingling or pinching in the hip, knee or back. A straight leg is not a requirement for a useful practice.
4. Eight-Angle Pose (Astavakrasana)
What it is and why it's hard: Eight-Angle Pose is a twisting arm balance in which the legs wrap around one arm and extend to one side while the hands support the body. The combination of rotation, compression, arm strength and core control makes it particularly demanding.
What you need first: Stable wrists and shoulders, controlled plank work, comfortable hip movement and experience with basic arm-balance preparations.
A safer progression:
- Warm up your wrists, shoulders and trunk.
- Practise supported side-plank variations to build lateral core strength.
- Explore the leg-over-arm position while seated, without forcing the knee.
- Practise lifting the hips slightly with blocks beneath the hands.
- Work towards the full pose with a qualified teacher, keeping the movement controlled.
Common mistakes: Collapsing into the shoulders, gripping the floor with tense fingers, rushing the leg wrap or holding your breath.
Gentler option: Side Plank with the lower knee down or a supported seated twist builds some of the required strength and control.
Safety note: Wrist discomfort is a reason to stop, not a challenge to overcome. Avoid practising on slippery flooring or when your arms are fatigued.
5. Handstand (Adho Mukha Vrksasana)
What it is and why it's hard: A handstand turns your usual relationship with gravity upside down. Your hands support your body while your shoulders, arms and core maintain alignment. Balance depends on small adjustments through the fingers, wrists, shoulders and trunk.
What you need first: Comfortable wrist loading, strong shoulders, controlled overhead movement, a stable plank and familiarity with safe exits from supported inversions.
A safer progression:
- Warm up your wrists, shoulders and upper back.
- Build shoulder endurance with appropriately modified planks and Dolphin Pose.
- Practise walking your feet up a wall only under qualified guidance.
- Learn alignment and controlled exits with a teacher and clear floor space.
- Progress to brief wall-supported holds before considering unsupported balance.
Common mistakes: Arching the lower back, kicking up too forcefully, looking around, allowing the shoulders to collapse or practising when tired.
Gentler option: Downward-Facing Dog and Dolphin Pose develop shoulder strength without requiring a full inversion.
Safety note: If your wrists complain during handstand preparation, stop loading them and reassess. Don't push through pain. Handstands need careful supervision, particularly when you are learning how to exit safely.
6. King Pigeon, Deep Backbend (Kapotasana)
What it is and why it's hard: In this deep kneeling backbend, the spine extends significantly while the chest opens and the hands reach towards the feet. It requires coordinated spinal extension, shoulder mobility, hip extension and strong back-body support.
What you need first: Comfortable, controlled backbends; shoulder mobility without pinching; hip-flexor mobility; and the ability to keep your lower back from taking all the movement.
A safer progression:
- Begin with gentle Cat-Cow movements and supported chest opening.
- Practise Locust Pose to strengthen the back muscles.
- Build towards a comfortable Bridge Pose, if suitable for your body.
- Explore a supported Camel Pose without forcing your head or hands backwards.
- Attempt deeper backbend preparations only with a qualified teacher who can assess your readiness.
Common mistakes: Pushing the hips forward while compressing the lower back, flaring the ribs, forcing the shoulders overhead or grabbing the feet before the spine is ready.
Gentler option: Supported Bridge Pose or a small-range Camel Pose with hands on the pelvis.
Safety note: Never force a deep backbend. If you feel compression in the lower back or pain around the shoulders, return to a neutral position. Advanced spinal extension needs individual assessment and preparation.
7. Peacock Pose (Mayurasana)
What it is and why it's hard: In Peacock Pose, the hands support the body while the elbows press into the abdominal area and the legs lift behind you. The pose combines substantial wrist loading, shoulder and arm strength, core engagement and careful balance.
What you need first: Comfortable wrist extension, strong arms and shoulders, controlled plank work and an ability to maintain trunk tension without holding your breath.
A safer progression:
- Warm up the wrists and forearms gently.
- Practise modified plank holds to assess your tolerance for hand loading.
- Build controlled push-up strength with an appropriate range of motion.
- Learn the elbow and hand placement from a qualified teacher without lifting your feet.
- Explore a supported, low lift only when your teacher confirms that you can enter and exit safely.
Common mistakes: Placing pressure unevenly through the wrists, flaring the elbows, swinging the legs upward or straining the neck.
Gentler option: Kneeling plank or a wall-supported plank helps develop upper-body strength with less balance demand.
Safety note: Peacock can place significant pressure on the wrists and abdomen. Avoid self-teaching the full pose, and seek individual medical advice if you have wrist problems, abdominal concerns or recent surgery.
8. Forearm Stand (Pincha Mayurasana)
What it is and why it's hard: Also called Feathered Peacock Pose, the Forearm Stand balances the body upside down on the forearms. It demands shoulder stability, upper-back mobility, core control and a good understanding of how to balance and exit an inversion.
What you need first: Strong, stable shoulders; comfortable forearm support; Dolphin Pose control; and experience with a teacher-guided approach to inversions.
A safer progression:
- Warm up the shoulders and upper back.
- Practise Dolphin Pose with steady breathing.
- Work on shoulder alignment and forearm placement without kicking up.
- Practise a teacher-supervised wall-supported variation with ample clearance.
- Develop balance gradually, learning a safe exit before moving away from the wall.
Common mistakes: Letting the elbows spread, sinking between the shoulders, arching the back excessively or kicking up without control.
Gentler option: Dolphin Pose with knees bent, or a short supported hold with both feet remaining on the floor.
Safety note: Forearm stands are advanced inversions. Do not practise them alone when learning, and avoid them if you have relevant medical contraindications unless a qualified clinician has cleared you.
9. Feet-Behind-Head Pose (Dwi Pada Sirsasana)
What it is and why it's hard: This seated pose places both legs behind the head, requiring very substantial hip rotation and flexibility. The difficulty is not simply reaching the feet into position; it is doing so without forcing the knees, compressing the neck or losing control of the pelvis.
What you need first: Exceptional, comfortable hip mobility, controlled hamstring movement and experience with demanding seated hip-opening postures. General flexibility alone is not enough.
A safer progression:
- Start with gentle hip rotations and comfortable seated positions.
- Practise reclined figure-four stretches without pulling on the knee.
- Develop active hip mobility rather than relying only on passive stretching.
- Explore one-leg-behind-head preparation only with an experienced teacher, and only if your hip allows it naturally.
- Consider the two-leg variation only after an expert has assessed your readiness; there is no need to complete the full pose.
Common mistakes: Pulling the foot into place with the hands, rounding the neck to make room, forcing the knee or treating discomfort as proof of progress.
Gentler option: Reclined figure-four, supported pigeon variations or comfortable seated hip rotations.
Safety note: Never force your legs behind your head. Stop immediately for knee pain, hip pinching, numbness or tingling. This pose is unsuitable for many practitioners, and skipping it is entirely reasonable.
10. Scorpion Pose (Vrischikasana)
What it is and why it's hard: Scorpion combines a forearm balance with a deep backbend, bringing the feet towards the head while the body remains inverted. It demands strong shoulders, precise balance, spinal extension and the ability to control the shape without collapsing into the lower back.
What you need first: A stable Forearm Stand, controlled shoulder movement, strong core engagement and comfortable backbend preparation. You must also know how to exit the inversion safely.
A safer progression:
- Build shoulder strength and mobility with Dolphin Pose.
- Practise supported backbends within a comfortable range.
- Develop a stable forearm balance with a qualified teacher.
- Learn controlled leg movement against a wall without forcing the backbend.
- Combine the inversion and backbend only under close supervision when both components are well established.
Common mistakes: Kicking too hard, allowing the elbows to spread, forcing the feet towards the head or taking all the extension in the lower back.
Gentler option: Practise supported Forearm Stand preparation separately from gentle Bridge Pose or another appropriate backbend.
Safety note: Scorpion is not a suitable pose for casual experimentation. Advanced inversions and deep backbends should be taught in person by a qualified instructor, with adequate space and appropriate preparation.
How to Progress Safely
Treat advanced yoga as a gradual learning process, not a checklist to finish by a particular date.
Practise the prerequisites consistently, take rest when your body needs it and revisit easier variations even as you become stronger. Stop a drill when your technique deteriorates or you cannot maintain steady breathing.
Change one challenge at a time. For example, work on shoulder stability before adding the balance element of a Forearm Stand. If a pose feels unstable, return to the previous step rather than trying harder.
The aim of yoga is not to perform the hardest pose. Skipping advanced arm balances, inversions or deep backbends does not make you a lesser practitioner. Comfort, awareness and a consistent practice are worthwhile goals in their own right.
Frequently asked questions
What is the hardest yoga pose?
Scorpion Pose, Handstand and Feet-Behind-Head Pose are among the most challenging yoga poses because they require exceptional strength, balance, flexibility and body control.
What are the hardest yoga poses for beginners?
Handstand, Scorpion, Peacock and deep King Pigeon are difficult for beginners. Build strength and flexibility with basic poses before attempting them under qualified supervision.
Which yoga pose requires the most flexibility?
Feet-Behind-Head Pose requires extreme hip mobility. Compass Pose and deep backbends also demand considerable flexibility in specific areas of the body.
Which yoga poses require the most strength?
Firefly, Eight-Angle, Peacock and Handstand require significant arm, shoulder and core strength to maintain balance and control.
Can beginners practise advanced yoga poses at home?
Beginners can build strength and flexibility at home, but advanced inversions and deep backbends should be learned with a qualified yoga teacher.
How can I prepare for difficult yoga poses?
Start with a gentle warm-up, build core and shoulder strength, improve mobility gradually, and use props when needed. Practise consistently without forcing your body.
Are the hardest yoga poses dangerous?
Advanced poses can increase injury risk when attempted without preparation or proper guidance. Stop if you experience sharp pain, numbness, tingling or dizziness.
Do I need to master difficult yoga poses to benefit from yoga?
No. You can benefit from a regular yoga practice without attempting advanced poses. Focus on comfortable movement, steady breathing, flexibility and consistency.
Reading is a start. A live teacher is the shortcut.
In a Devine Yoga Online class your trainer sees you, corrects you by name and adapts every pose to your body - beginners included.